





Dentiphoto E220 Spectrophotometer Quick Guide
Dentiphoto E220
Spectrophotometer
Quick Guide
Accurate shade
in 1 second. Every time.
A short, practical guide to stable, repeatable readings with your E220 — and to understanding what the screen tells you.
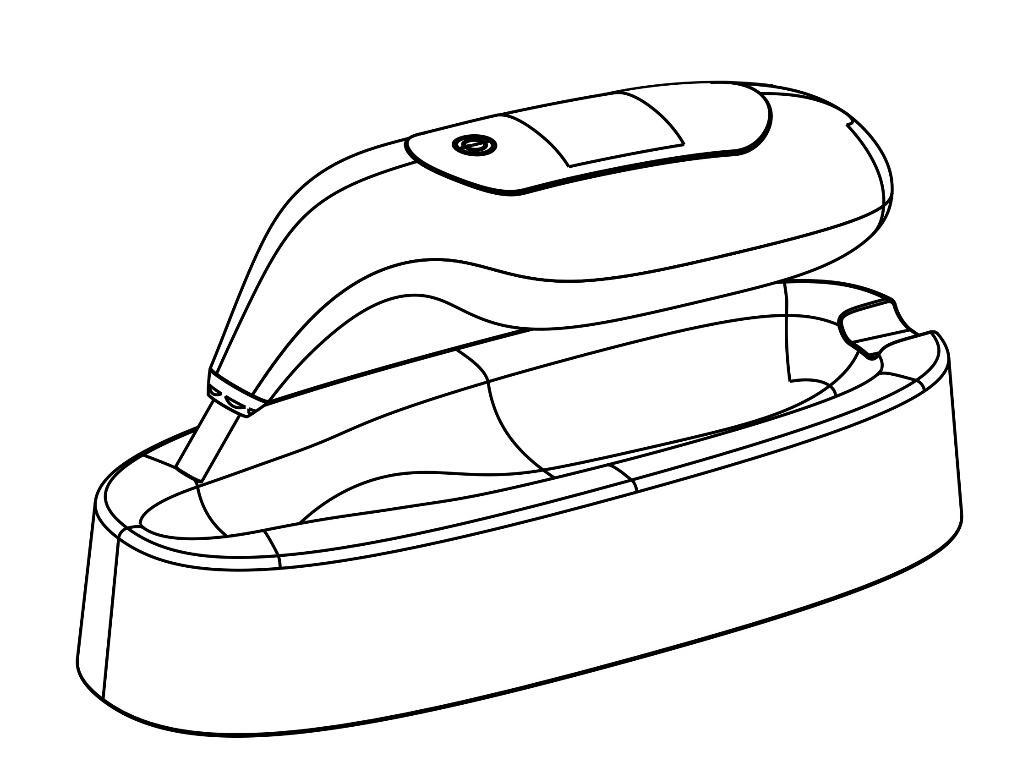 Shade Matching
How to get stable readings
Almost every “the readings keep changing” case comes down to one of these five points. Follow them and the E220 will give you consistent results.
Measure at the start of the appointment, on a moist tooth
A tooth that dries out (mouth open, cotton rolls, air syringe, rubber dam) quickly becomes lighter and more opaque. Take the shade before any preparation, isolation or bleaching, and never on a tooth that has been exposed to air for minutes.
Always aim at the same spot: the middle of the crown
Tooth colour is different at the edge, the middle and near the gum. Moving the tip by just 1–2 mm can give the neighbouring shade. Place the tip in the centre of the crown, slightly toward the gum — where the dentin layer is thickest.
Tip flat and perpendicular to the surface
The whole tip must touch the enamel — no tilt, no gap. A tilted tip lets in outside light and changes the reading.
Hold completely still until you hear 3 beeps
Do not lift or slide the device until the third beep. Moving early produces an error or a wrong value.
Take 3 readings — use the one that repeats
Lift the device, re-place it and measure again. If 2 of 3 readings agree, that is your shade. A one-step difference between readings (e.g. 2M2 / 2M3) is normal for any spectrophotometer — it means the tooth sits between two shades.
Never measure through
- the silicone cover
- plastic wrap / barrier film
- fillings, crowns, veneers
- plaque, stain or saliva bubbles
Before you start
Know the parts and run through this checklist before each patient.
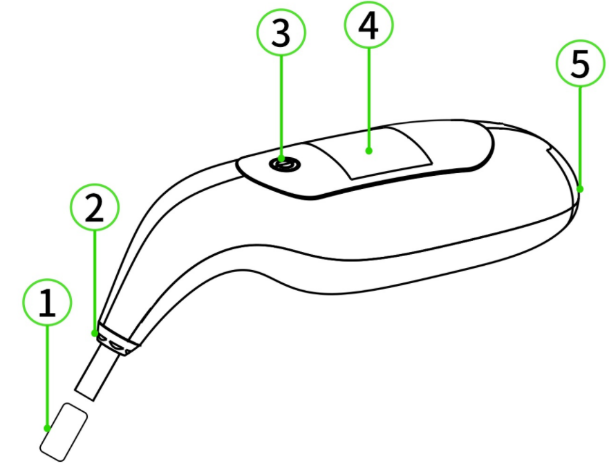
| # | Part |
|---|---|
| 1 | Silicone cover — remove before measuring, put back after |
| 2 | Detection tip — touches the tooth |
| 3 | Button — power on (hold 3 s) / measure (short press) / power off (hold) |
| 4 | Display |
| 5 | USB Type-C charging port |
Checklist — device
- Battery above 15%. Below that, stop and charge (full charge ≈ 4.5 h; charge 4+ h before first use).
- Silicone cover removed.
- Tip clean and dry — wipe with 70–80% alcohol and let it dry.
- Nothing covering the tip (no barrier film or wrap).
- Screen shows Ready.
Checklist — patient
- Patient seated, head resting firmly on the headrest.
- Shade taken first — before isolation, preparation or bleaching.
- Tooth surface clean: remove plaque or stain; gently remove excess saliva with gauze, then measure right away.
- Measuring natural tooth tissue only — not fillings or restorations.
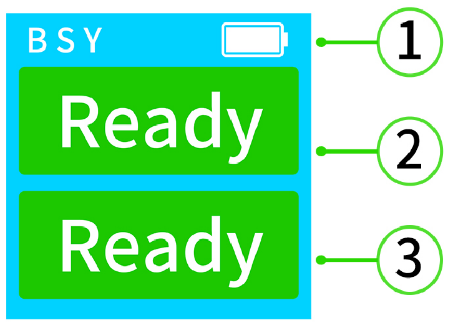
The Ready screen
1 — battery level
2 — top row: VITA 3D-MASTER® result
3 — bottom row: VITA classical A1–D4® result
The device turns itself off after 2 minutes without use.
How to measure
Where you put the tip matters more than anything else.
Look at the tooth and find the centre of the dentin-coloured area.
Place the tip there, flat and perpendicular to the tooth surface.
Press the button once.
Hold completely still until you hear 3 short beeps.
Lift the device and read the result.
Repeat two more times. Use the shade that appears at least twice.
Tip position
Reading the screen
The colour behind each result works like a traffic light: it tells you how close the tooth is to a standard shade tab. Two values on one row is not an error — it means the tooth sits between two shades.
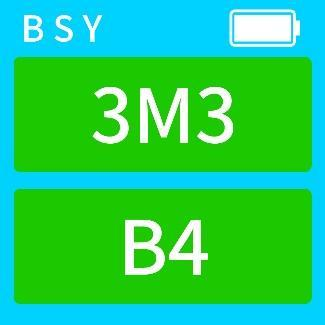
Close match
The tooth matches the shown shade, or is only slightly different. Use it as is.
Example: 3D-MASTER 3M3, classical B4.
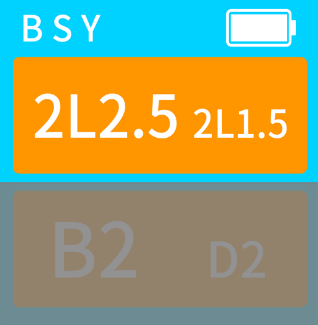
Between two shades — mix them
Left (large) = best match, right (small) = second match. The tooth is between the two. Mixing the two 3D-MASTER materials 1:1 gives the intermediate shade (here 2L2.5 + 2L1.5).
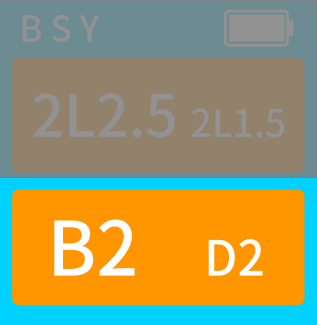
Between two shades — choose
Left = best match, right = second-best. Unlike 3D-MASTER, these two are not a mixing recipe — pick the left one, or use the right one as a reference for the lab.
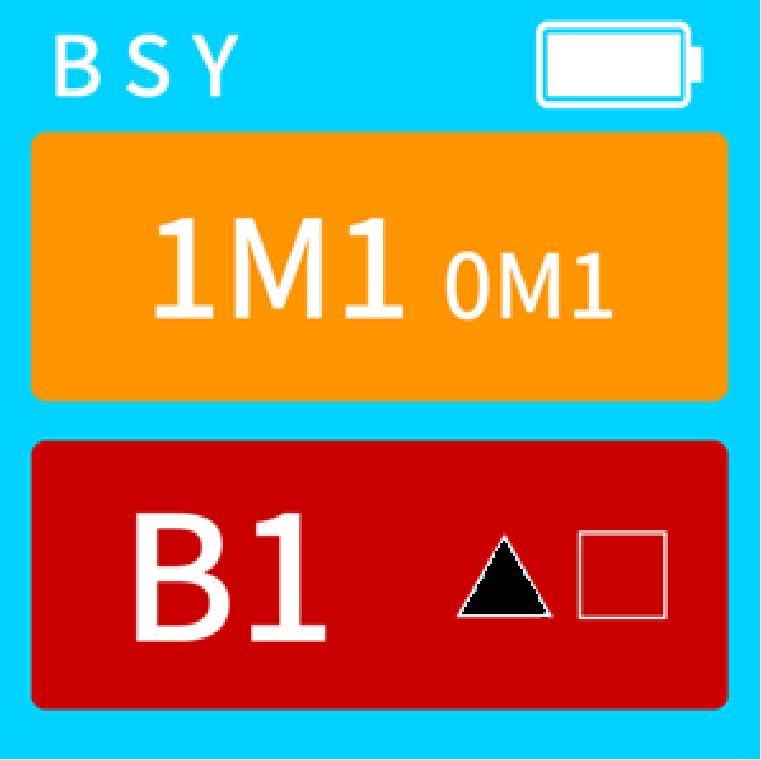
Tooth is far from any standard tab
The shown shade is the nearest, but the tooth differs noticeably. The icons show which way it differs — pass this to the lab:
Example: B1, darker and redder.
“I get different readings” — what is normal?
Check this table before contacting support.
| What you see | Most likely reason | What to do |
|---|---|---|
| Readings differ by one step (e.g. 2M2 ↔ 2M3, A2 ↔ A3) | Normal — the tooth is between two shades | Take 3 readings, use the one that repeats. Check the yellow second value. |
| First reading darker, later readings lighter and lighter | The tooth is drying out | Measure at the very start, before isolation. If the tooth has dried, ask the patient to close their lips for a few minutes, then re-measure. |
| Big jumps between readings on the same tooth | Tip placed at a different spot, tilted, or lifted before 3 beeps | Same spot every time, flat and perpendicular, hold until 3 beeps. |
| Result clearly wrong for every tooth | Silicone cover or barrier film on the tip; dirty tip | Remove anything covering the tip; clean it with alcohol and let it dry. |
| Result differs from the visual shade guide | Visual matching depends on light and the eye; the E220 measures objectively | Trust a consistent E220 reading taken following the rules above. Compare under the same conditions. |
| Strange values on a crown, veneer or filling | The E220 is designed for natural teeth only | Measure the natural neighbouring tooth instead. |
| Unstable values when the battery icon is low | Battery below 15% | Charge the device when the battery is below 15%. |
| Device does not turn on | Battery empty | Charge via USB-C, then hold the button for 3 s. |
| No shade is displayed | Colour outside the natural tooth range, or the tip slipped | Re-place the tip correctly and re-measure. |
Error screens
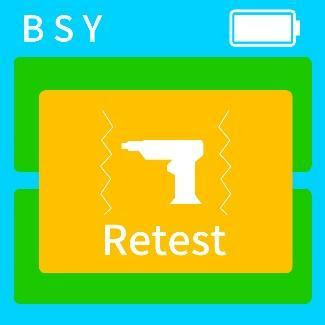
Measurement failed
Usually the device moved before the 3 beeps. Re-place the tip and hold still.

Target not recognised
The tip is not on natural tooth, not in full contact, or slipped. Repeat the measurement steps.
Care, charging & storage
Cleaning & disinfection
- Before first use and after every patient.
- Wipe off residue with a damp cloth, then dry.
- Disinfect by wiping with gauze soaked in 70–80% alcohol.
- Do not spray or rinse the device.
- Avoid products with iodine, phenols or methyl ethyl ketone — they can damage the surface.
Charging

- Charge 4+ hours before first use.
- Stop and charge below 15%. Full charge ≈ 4.5 h.
- Use only the supplied adapter.
- Not in use? Charge at least once a month.
Safety
- Do not look directly into the tip when the light is on.
- Keep away from liquids, heat and high humidity. Use at 16–45 °C.
- Do not open or repair the device — this voids the warranty.
- Always put the silicone cover back on after use to protect the tip.
Still getting inconsistent readings?
Follow the rules above for one day of patients. If readings are still unstable, contact us and include:
- a photo of the screen for 3 readings on the same tooth;
- whether it is consecutive readings that differ, or the result vs. a visual guide / the lab;
- if possible, a short video of how you place the device.
This guide complements the full E220 User Manual. VITA 3D-MASTER® and VITA classical A1–D4® are registered trademarks of their respective owner. Warranty: 1 year from delivery.