









Introducción
Crear una restauración de aspecto completamente natural requiere más que una preparación precisa y materiales de alta calidad. Ya sea que se fabrique una corona unitaria, una carilla de porcelana, una restauración de composite o una prótesis implantosoportada, lograr el color dental correcto es uno de los factores más importantes que influyen en el resultado estético final.
Los dientes naturales son extraordinariamente complejos. Su aspecto no está determinado únicamente por el color, sino también por la translucidez, la luminosidad (valor), el croma, la textura superficial y la forma en que la luz interactúa con el esmalte y la dentina. Incluso una restauración técnicamente perfecta puede parecer artificial si estas características ópticas no se reproducen con precisión.
La odontología moderna ofrece dos enfoques principales para la selección del color. Las guías de colores visuales tradicionales siguen siendo el método más utilizado porque son prácticas, fiables y aceptadas por prácticamente todos los laboratorios dentales. Al mismo tiempo, las tecnologías digitales, incluidos los espectrofotómetros, los colorímetros y los sistemas avanzados de obtención de imágenes, han introducido mediciones objetivas que mejoran la uniformidad, especialmente en casos de alta exigencia estética.
La coincidencia del color no depende únicamente de la herramienta. La técnica clínica, las condiciones de iluminación, la hidratación dental, la comunicación con el laboratorio y los flujos de trabajo estandarizados desempeñan igualmente un papel importante.
Esta guía explica los principios de la coincidencia del color dental, compara las técnicas visuales y digitales, destaca los errores clínicos más frecuentes y ofrece recomendaciones prácticas para ayudar a los dentistas a lograr resultados estéticos predecibles.
En esta guía
- Por qué es importante la coincidencia del color
- ¿Qué es la selección del color dental?
- Evolución de la coincidencia del color
- Selección visual del color
- Selección digital del color
- Factores que afectan a la precisión
- Errores frecuentes
- Flujo de trabajo paso a paso
- Lista de comprobación en el sillón dental
- Buenas prácticas
- Visual frente a digital
- Conclusión
- Herramientas recomendadas
- Referencias
Por qué es importante la coincidencia precisa del color dental
Para los pacientes, el éxito de una restauración suele juzgarse en cuestión de segundos. Mientras los profesionales evalúan la integridad marginal, la oclusión y la función, los pacientes suelen fijarse primero en una sola cosa: si la restauración parece un diente natural.
Una selección incorrecta del color puede comprometer el aspecto de una restauración fabricada por lo demás a la perfección. Incluso pequeñas diferencias en luminosidad o croma pueden hacerse visibles bajo la luz natural, lo que provoca insatisfacción del paciente, más tiempo en el sillón y costosas repeticiones en el laboratorio.
La coincidencia precisa del color proporciona varios beneficios clínicos importantes:
- Crea restauraciones que se integran de forma natural con los dientes adyacentes.
- Mejora la comunicación entre el dentista y el laboratorio dental.
- Reduce la probabilidad de rehacer restauraciones y realizar ajustes de color.
- Aumenta la eficiencia durante los procedimientos restauradores.
- Aumenta la confianza del paciente y su satisfacción con el resultado final.
A medida que la odontología estética continúa evolucionando, los pacientes esperan restauraciones prácticamente indistinguibles de la dentición natural. Por ello, la selección uniforme del color se ha convertido en un componente esencial de los flujos de trabajo restauradores modernos.
¿Qué es la selección del color dental?

Anatomía dental natural que ilustra las variaciones de valor, croma, translucidez y textura superficial que influyen en una selección precisa del color dental.
La selección del color dental es el proceso clínico de determinar y comunicar el color natural y las características ópticas de los dientes de un paciente para que los materiales restauradores se integren perfectamente con la dentición circundante.
Aunque el término "color" se utiliza habitualmente, una coincidencia cromática exitosa implica mucho más que seleccionar un solo color. Los profesionales evalúan varias propiedades ópticas, entre ellas:
- Valor – la claridad u oscuridad general del diente.
- Matiz – la familia cromática básica del diente.
- Croma – la intensidad o saturación del color.
- Translucidez – el grado en que la luz atraviesa el esmalte.
- Textura y brillo de la superficie – características que influyen en el reflejo de la luz y en la percepción de la anatomía dental natural.
Estas variables difieren no solo entre pacientes, sino también dentro de un mismo diente. Los tercios cervical, medio e incisal suelen presentar características ópticas distintas, por lo que una evaluación integral es esencial para lograr restauraciones altamente estéticas.
La selección del color dental desempeña un papel fundamental en una amplia variedad de procedimientos, entre ellos:
- Coronas cerámicas
- Carillas de porcelana
- Restauraciones directas de composite
- Puentes fijos
- Restauraciones implantosoportadas
- Prótesis completas y parciales
Independientemente del tipo de restauración, el objetivo sigue siendo el mismo: producir una restauración visualmente indistinguible de los dientes naturales del paciente bajo diversas condiciones de iluminación.
La evolución de la selección del color dental
Durante décadas, los dentistas dependieron exclusivamente de guías visuales de color para comunicar el color de los dientes a los laboratorios dentales. Sistemas como la Guía de colores VITA Classical A1–D4 se convirtieron en el estándar mundial porque ofrecían un método sencillo y uniforme para seleccionar y registrar los colores dentales.
A medida que la odontología estética se expandió y aumentaron las expectativas de los pacientes, los profesionales reconocieron las limitaciones de la selección visual del color. La percepción humana del color está influida por la iluminación, la fatiga ocular, los colores circundantes, la deshidratación dental y la experiencia individual. Estas variables pueden provocar inconsistencias, especialmente en casos estéticos exigentes.
Para mejorar la objetividad, los fabricantes introdujeron dispositivos digitales de selección de color capaces de medir electrónicamente el color de los dientes. Los espectrofotómetros, colorímetros y sistemas ópticos híbridos analizan la luz reflejada y convierten las mediciones en valores de color estandarizados que pueden compartirse con los laboratorios dentales.
Hoy en día, la mayoría de las prácticas modernas de restauración no consideran que los métodos visuales y digitales sean tecnologías en competencia. Al contrario, se complementan. Las guías visuales de color siguen siendo la base de la selección rutinaria del color, mientras que los dispositivos digitales proporcionan verificación y documentación adicionales cuando se requiere mayor precisión.
Selección visual del color
A pesar de los importantes avances en odontología digital, la comparación visual de colores sigue siendo el método más utilizado en todo el mundo para seleccionar el color dental. En los procedimientos restauradores habituales, continúa siendo la base de la comunicación estética entre los profesionales clínicos y los laboratorios dentales porque es fiable, accesible y compatible prácticamente con todos los sistemas restauradores.
La comparación visual de colores consiste en comparar muestras de color estandarizadas con la dentición natural del paciente en condiciones clínicas controladas. El profesional evalúa el aspecto general del diente y selecciona el color que reproduce más fielmente sus características ópticas. Aunque el proceso parece sencillo, la coherencia de los resultados depende de la experiencia, una iluminación estandarizada y un protocolo clínico estructurado.

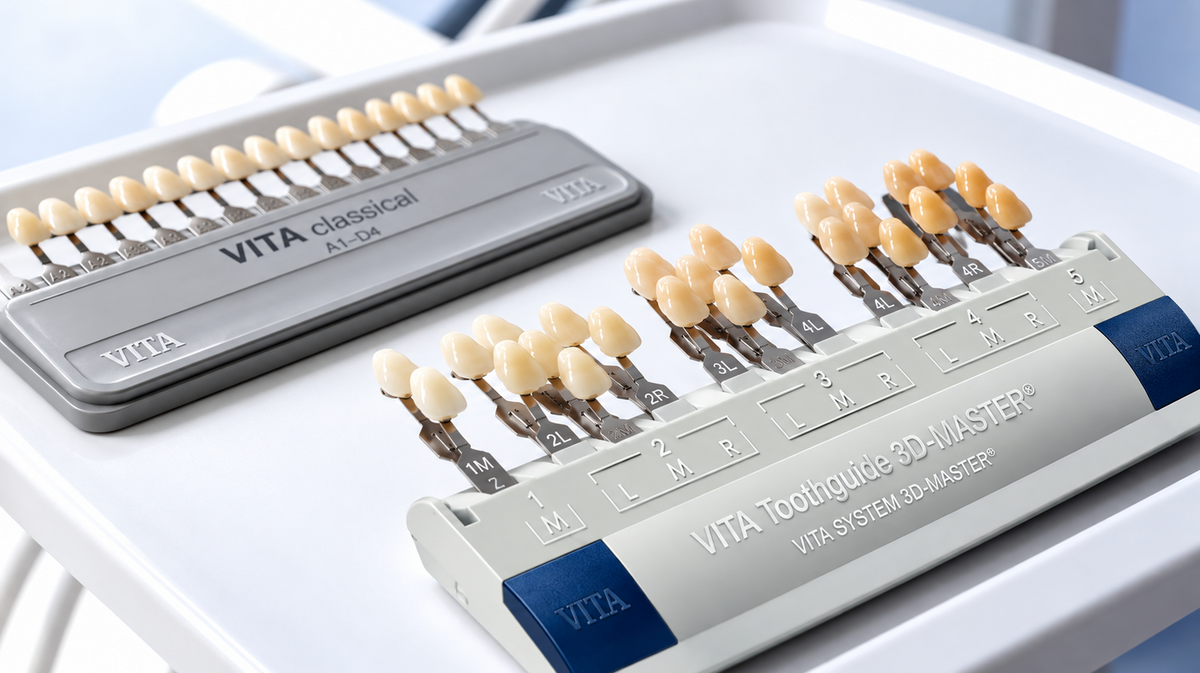
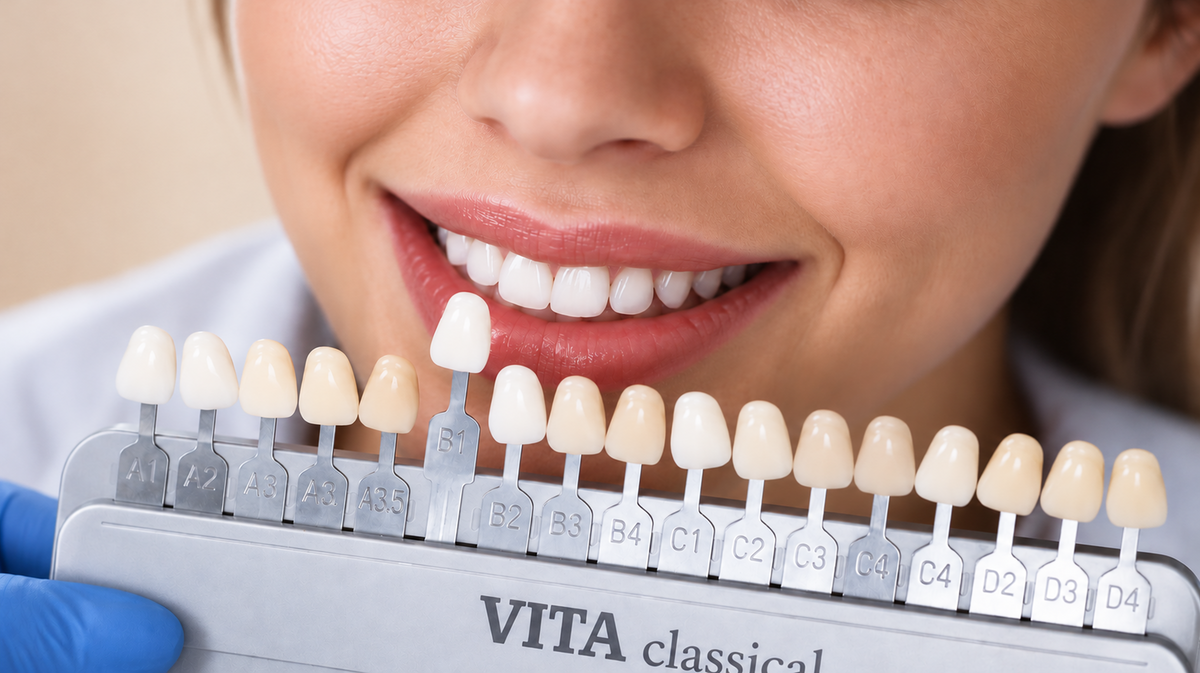
Guía de colores VITA Classical utilizada para la selección visual del color dental en odontología restauradora.
Cómo funcionan las guías visuales de colores
Las guías de colores modernas están diseñadas para estandarizar la comunicación entre dentistas y técnicos dentales. En lugar de describir un diente simplemente como «blanco» o «amarillo», los profesionales clínicos seleccionan un color predefinido que corresponde a una combinación específica de valor, matiz y saturación.
Los dos sistemas más utilizados en odontología restauradora son:
VITA Classical A1–D4
La guía de colores VITA Classical ha sido el estándar mundial del sector durante décadas. Contiene dieciséis muestras de color agrupadas en cuatro categorías de matiz:
- A – marrón rojizo
- B – amarillo rojizo
- C – gris
- D – gris rojizo
Dentro de cada grupo, los números crecientes generalmente indican una mayor saturación y tonos ligeramente más oscuros.
Gracias a su simplicidad y amplia aceptación, el sistema VITA Classical sigue siendo el estándar de referencia para coronas, puentes, carillas, restauraciones sobre implantes y procedimientos con composite directo.
Guía de colores VITA Toothguide 3D-MASTER
El sistema VITA 3D-MASTER se desarrolló para mejorar la organización del color y aumentar la precisión de la selección del color.
A diferencia del sistema Classical, sigue la secuencia en la que el ojo humano percibe naturalmente el color:
- Determina el valor (luminosidad).
- Selecciona la saturación (intensidad del color).
- Elige el matiz (familia de colores).
Este flujo de trabajo lógico permite a los profesionales clínicos distinguir con mayor precisión las diferencias sutiles de color, especialmente en restauraciones anteriores de alta estética.
¿Aún estás indeciso entre VITA Classical y VITA 3D-MASTER? Lee nuestra comparación detallada para descubrir qué guía de colores se adapta mejor a tu flujo de trabajo clínico: VITA Classical frente a VITA 3D-MASTER: ¿Cuál deberías elegir?
Ventajas de la igualación visual del color
Cuando se realiza en condiciones estandarizadas, la igualación visual del color ofrece varias ventajas clínicas importantes.
Flujo de trabajo clínico sencillo
No se requiere software, calibración ni equipo electrónico. La selección del color puede completarse en cuestión de minutos durante casi cualquier cita restauradora.
Comunicación universal con el laboratorio
Prácticamente todos los laboratorios dentales reconocen sistemas de color estandarizados como VITA Classical y VITA 3D-MASTER, lo que facilita la comunicación y reduce los malentendidos.
Rentable
Las guías visuales de color requieren una inversión mínima en comparación con los dispositivos digitales de igualación del color, por lo que son adecuadas para consultorios de cualquier tamaño.
Toma rápida de decisiones en el consultorio
Los profesionales con experiencia a menudo pueden determinar un color adecuado en cuestión de segundos cuando utilizan una iluminación apropiada y un protocolo de evaluación uniforme.
Fiable para la odontología diaria
En coronas unitarias, restauraciones posteriores, reparaciones con composite y muchos casos protésicos habituales, la igualación visual del color sigue proporcionando resultados clínicos predecibles.
Limitaciones de la igualación visual del color
Aunque la igualación visual del color sigue siendo el estándar clínico, depende completamente de la percepción humana. A diferencia de los sistemas digitales, los profesionales no miden objetivamente el color del diente, sino que lo interpretan.
Varias variables pueden influir en la selección final del color.
Condiciones de iluminación
La calidad de la luz afecta profundamente la percepción del color. Las luces cálidas del consultorio pueden hacer que los dientes parezcan más amarillos, mientras que la iluminación fría puede exagerar su luminosidad. Siempre que sea posible, la selección del color debe realizarse con luz natural o con iluminación odontológica estandarizada y corregida cromáticamente.
Fatiga visual
El ojo humano pierde rápidamente sensibilidad al evaluar diferencias sutiles de color. Observar las guías de color durante períodos prolongados puede reducir la precisión. Muchos profesionales recomiendan limitar las comparaciones a solo unos segundos antes de enfocar brevemente la mirada en una superficie gris neutra para recuperar la percepción visual.
Hidratación del diente
Incluso un breve período de deshidratación puede alterar significativamente el aspecto del esmalte. Los dientes se vuelven más claros y opacos al perder humedad, lo que aumenta el riesgo de seleccionar un color incorrecto.
Experiencia del operador
Reconocer las diferencias en translucidez, textura superficial, fluorescencia y caracterización requiere experiencia clínica. Dos profesionales pueden seleccionar legítimamente colores diferentes para el mismo paciente si sus técnicas de evaluación difieren.
Influencias del entorno
El lápiz labial brillante, la ropa colorida, las paredes reflectantes del consultorio y los objetos circundantes pueden afectar la percepción visual. Muchos consultorios odontológicos utilizan intencionalmente entornos de colores neutros durante la selección del color para minimizar el sesgo visual.
¿Cuándo es la mejor opción la selección visual del color?
La selección visual del color sigue siendo el enfoque preferido para la mayoría de los procedimientos restauradores de rutina, entre ellos:
- Coronas unitarias
- Restauraciones posteriores
- Restauraciones directas de composite
- Puentes fijos
- Coronas sobre implantes
- Tratamientos protésicos de rutina
Cuando se combina con una iluminación adecuada, protocolos estandarizados y una comunicación clara con el laboratorio, una guía de tonos visual de alta calidad sigue proporcionando resultados clínicos altamente predecibles.
En casos estéticos especialmente exigentes, como carillas de porcelana, rehabilitaciones completas de la sonrisa o restauraciones con cerámicas muy translúcidas, muchos profesionales complementan la evaluación visual con la selección digital del color para mejorar la consistencia, en lugar de reemplazar los métodos tradicionales.
Consejo clínico
Los odontólogos estéticos con experiencia rara vez se basan en una sola muestra de color. En su lugar, evalúan varias muestras, comparan diferentes regiones del diente y confirman su selección mediante fotografías clínicas antes de comunicar el caso al laboratorio dental.
Selección digital del color
A medida que la odontología restauradora se ha centrado cada vez más en la estética, los profesionales han buscado métodos más objetivos para evaluar el color dental. Aunque la selección visual del color sigue siendo el estándar clínico, las tecnologías de selección digital del color han transformado la forma en que muchos consultorios abordan los casos restauradores complejos.
La selección digital del color utiliza instrumentos ópticos especializados para medir el color y las propiedades ópticas de los dientes naturales, en lugar de depender únicamente de la percepción visual del profesional. Estas mediciones pueden convertirse en valores de tonos estandarizados y compartirse directamente con el laboratorio dental, lo que ayuda a mejorar la consistencia durante todo el flujo de trabajo restaurador.
Hoy en día, la selección digital del color se utiliza ampliamente en odontología estética, prótesis sobre implantes y casos en los que es esencial lograr resultados estéticos altamente predecibles.
 Espectrofotómetro digital utilizado para la medición objetiva del color dental en odontología restauradora.
Cómo funciona la selección digital del color
A diferencia de las guías de tonos visuales convencionales, los sistemas digitales analizan la forma en que la luz interactúa con la estructura dental.
Según el dispositivo, las mediciones pueden obtenerse mediante espectrofotometría, colorimetría o tecnologías avanzadas de obtención de imágenes ópticas. Estos sistemas evalúan la luz reflejada y calculan valores de color estandarizados que corresponden a sistemas de tonos reconocidos, como VITA Classical o VITA Toothguide 3D-MASTER.
La mayoría de los dispositivos modernos analizan simultáneamente varias características ópticas, entre ellas:
- Valor (luminosidad) – qué tan claro u oscuro parece el diente.
- Matiz – la familia de color predominante.
- Croma – la intensidad o saturación del color.
- Translucidez – el grado en que la luz atraviesa el esmalte.
- Reflectancia de la superficie – cómo se refleja la luz en la superficie del diente.
Algunos sistemas avanzados también generan mapas digitales del color que ilustran las variaciones cromáticas en diferentes regiones del diente. Estos mapas proporcionan a los técnicos dentales información adicional que no puede comunicarse únicamente mediante una designación de color.
Tipos de dispositivos digitales para la selección del color
Aunque el término «selección digital del color» se utiliza a menudo de forma general, en la odontología moderna existen varias tecnologías diferentes.
Espectrofotómetros
Los espectrofotómetros son ampliamente considerados los dispositivos digitales más precisos para la selección del color.
Miden el espectro de la luz reflejada en múltiples longitudes de onda, minimizando la influencia de la iluminación ambiental y proporcionando mediciones altamente reproducibles.
Por su precisión, los espectrofotómetros se utilizan habitualmente para:
- carillas de porcelana
- coronas cerámicas anteriores
- restauraciones sobre implantes
- rehabilitaciones de toda la boca
- aplicaciones de investigación
Colorímetros
Los colorímetros evalúan el color de los dientes mediante filtros de color predefinidos que aproximan la visión humana.
Aunque por lo general son menos precisos que los espectrofotómetros, siguen siendo valiosos para muchos procedimientos restauradores de rutina y a menudo proporcionan mediciones más rápidas en el consultorio.
Sistemas basados en imágenes
Algunos fabricantes combinan la fotografía clínica de alta resolución con software especializado capaz de analizar el color de los dientes.
Estos sistemas pueden integrar el análisis del color, la fotografía digital y la comunicación con el laboratorio en un único flujo de trabajo, lo que los hace especialmente útiles para casos estéticos multidisciplinarios.
Ventajas de la selección digital del color
La tecnología digital ofrece varias ventajas importantes sobre la evaluación visual, especialmente al tratar casos estéticos exigentes.
Mayor objetividad
Como las mediciones se obtienen electrónicamente, los sistemas digitales reducen significativamente la influencia de la percepción subjetiva humana del color.
Esto ayuda a mejorar la uniformidad entre los clínicos, las citas y los técnicos de laboratorio.
Mejor comunicación con el laboratorio
En lugar de enviar únicamente una designación de color como A2, los clínicos pueden proporcionar información digital adicional, que incluye:
- valores numéricos del color
- mapas de color
- fotografías clínicas calibradas
- información sobre la translucidez
- caracterización de la superficie
Esta información adicional permite a los técnicos de laboratorio reproducir el aspecto natural de los dientes con mayor precisión.
Mejor documentación
Las mediciones digitales pasan a formar parte de la historia clínica del paciente.
Si es necesario rehacer una restauración meses o años después, se puede consultar la información previa sobre el color sin depender únicamente de las notas escritas.
Mayor uniformidad
Los casos restauradores extensos suelen requerir varias citas.
Las mediciones digitales ayudan a garantizar que la selección del color se mantenga uniforme durante todo el tratamiento, reduciendo la variabilidad causada por cambios en la iluminación, la fatiga del clínico o las condiciones ambientales.
Útiles para casos estéticos complejos
Los sistemas digitales son particularmente valiosos al tratar:
- carillas de porcelana
- coronas anteriores
- restauraciones implantosoportadas
- rehabilitaciones completas de la sonrisa
- pacientes con una coloración dental inusual
- restauraciones cerámicas altamente translúcidas
En estas situaciones, incluso pequeñas mejoras en la comunicación del color pueden contribuir a obtener mejores resultados estéticos.
Limitaciones de la selección digital del color
Aunque la tecnología digital ha mejorado significativamente la selección del color, ningún dispositivo puede sustituir por completo el criterio clínico.
La selección exitosa del color aún depende de una técnica y una interpretación adecuadas.
Mayor inversión inicial
Los dispositivos digitales de selección del color requieren una inversión económica considerablemente mayor que las guías de color tradicionales.
Para las clínicas que realizan principalmente procedimientos restauradores rutinarios, el costo adicional no siempre está justificado.
Requisitos de calibración
Para mantener la precisión de las mediciones, la mayoría de los sistemas digitales requieren una calibración periódica conforme a las recomendaciones del fabricante.
No calibrar correctamente el dispositivo puede reducir la fiabilidad de las mediciones.
Curva de aprendizaje
Aunque los sistemas modernos son cada vez más fáciles de usar, los profesionales clínicos deben comprender el posicionamiento correcto, los protocolos de medición y la interpretación de los resultados digitales.
Como ocurre con cualquier tecnología clínica, la experiencia mejora la uniformidad de los resultados.
Variación entre dispositivos
Los distintos fabricantes utilizan diferentes tecnologías ópticas y algoritmos.
Como resultado, las mediciones obtenidas con dos dispositivos diferentes no siempre pueden ser idénticas, incluso al evaluar el mismo diente.
La experiencia clínica sigue siendo importante
Los dispositivos digitales miden el color con gran precisión.
no evalúan todas las características que contribuyen a una restauración natural.
Factores como:
- textura superficial
- grietas del esmalte
- surcos del desarrollo
- opalescencia
- fluorescencia
- caracterización individualizada
aún requieren una observación clínica y una comunicación cuidadosas con el laboratorio dental.
Selección digital del color y fotografía clínica
Una de las mayores ventajas de los flujos de trabajo digitales modernos es la integración de las mediciones del color con la fotografía clínica.
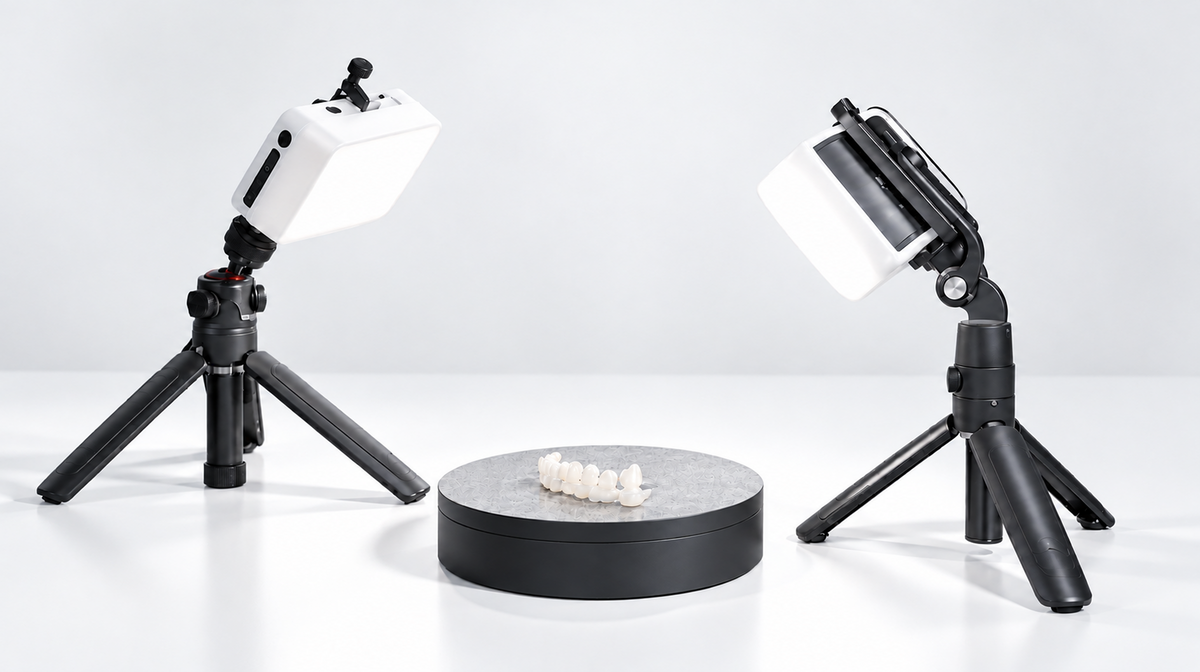
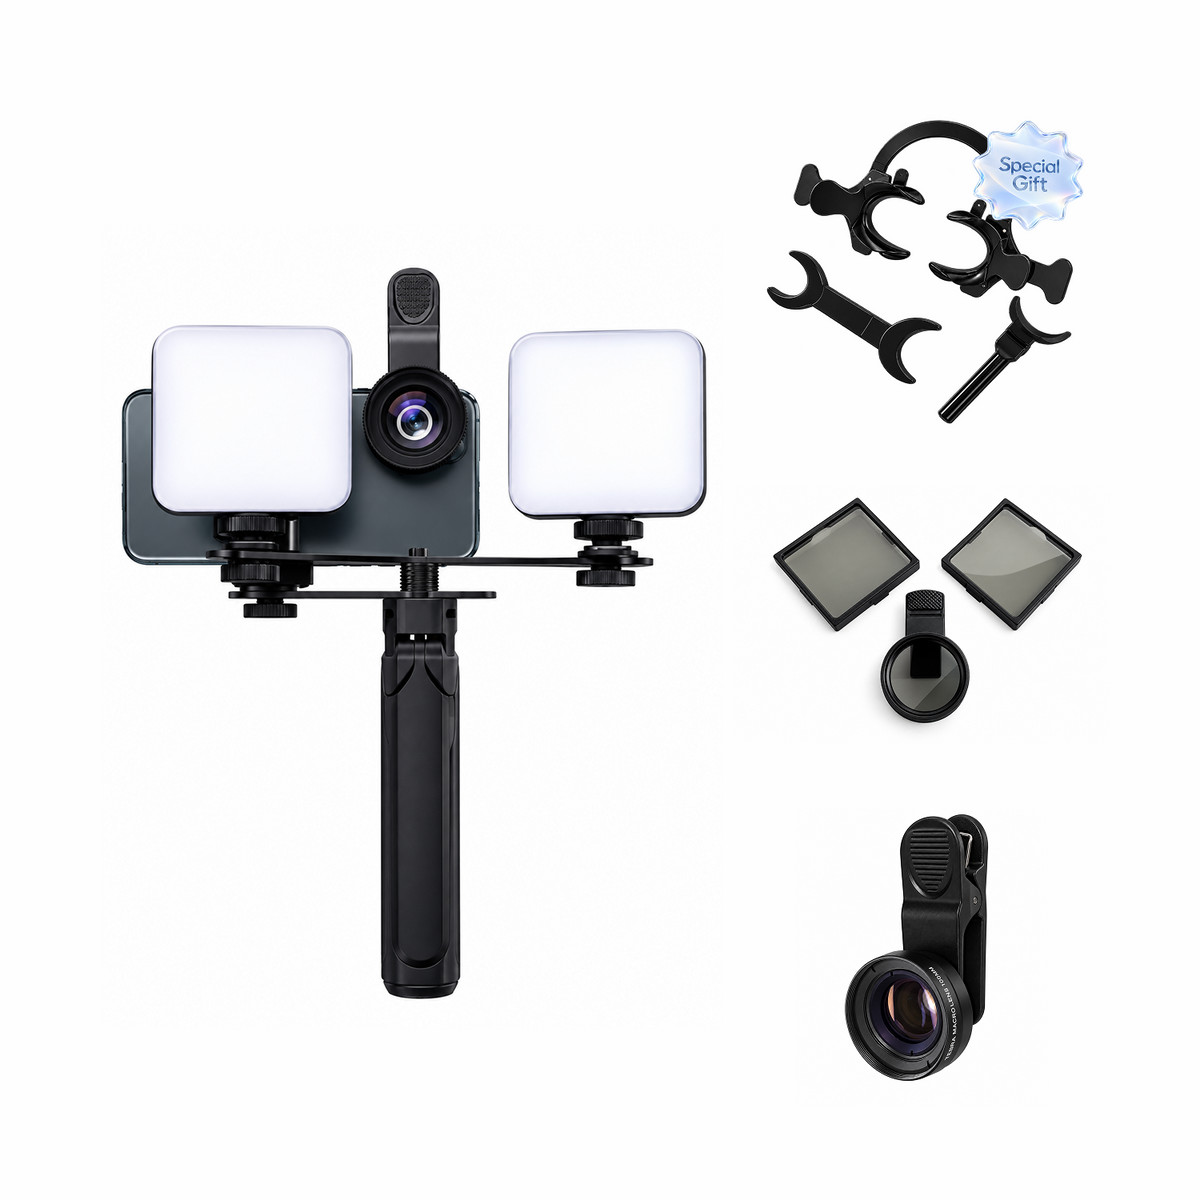
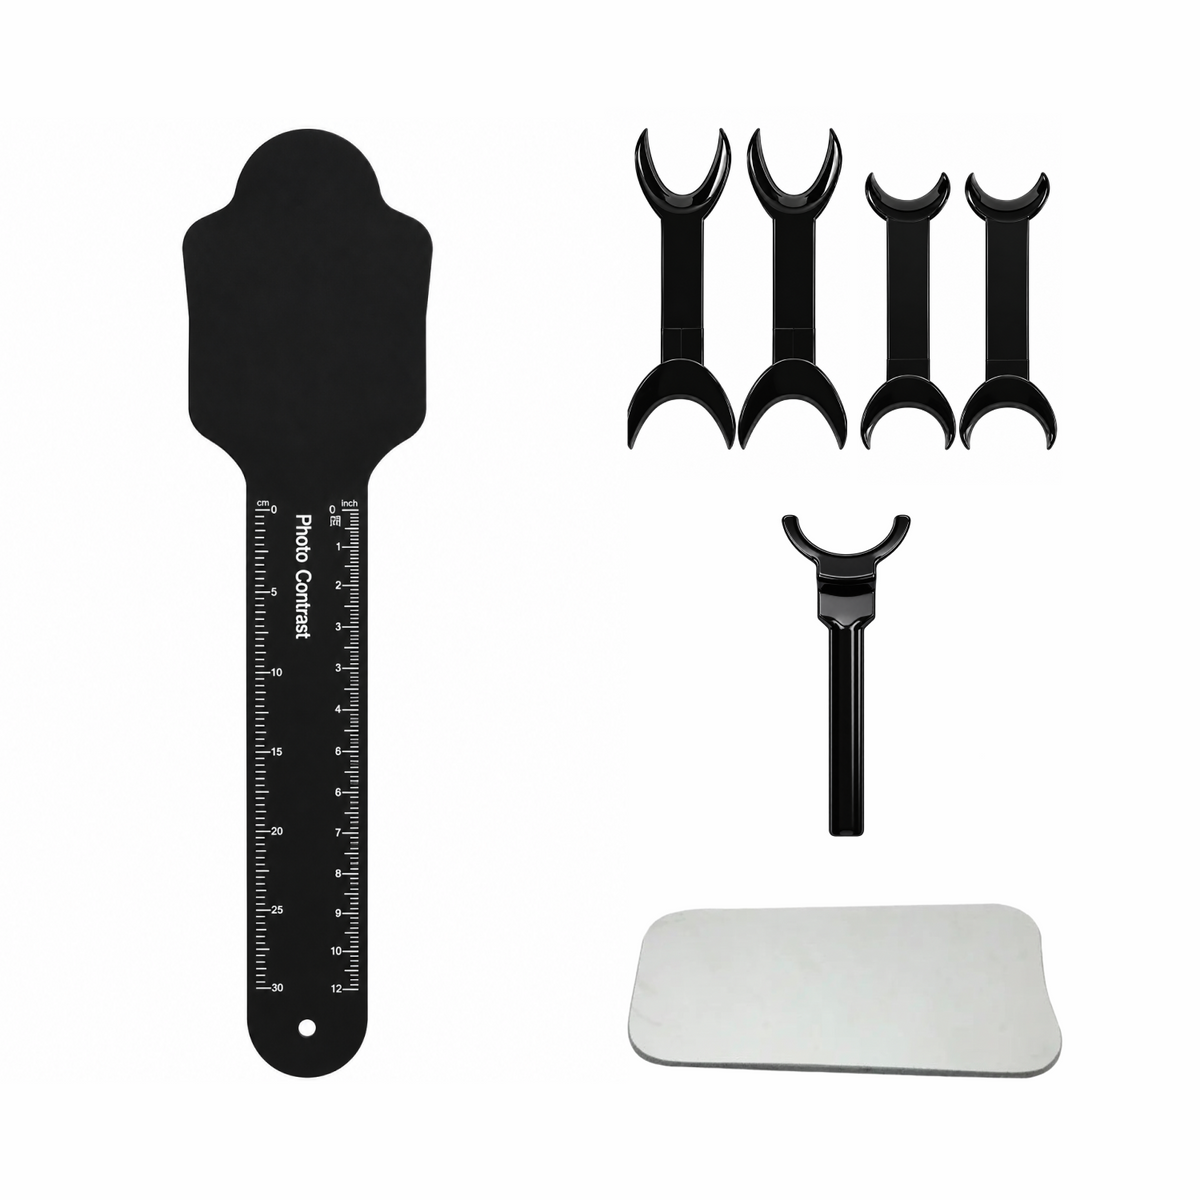
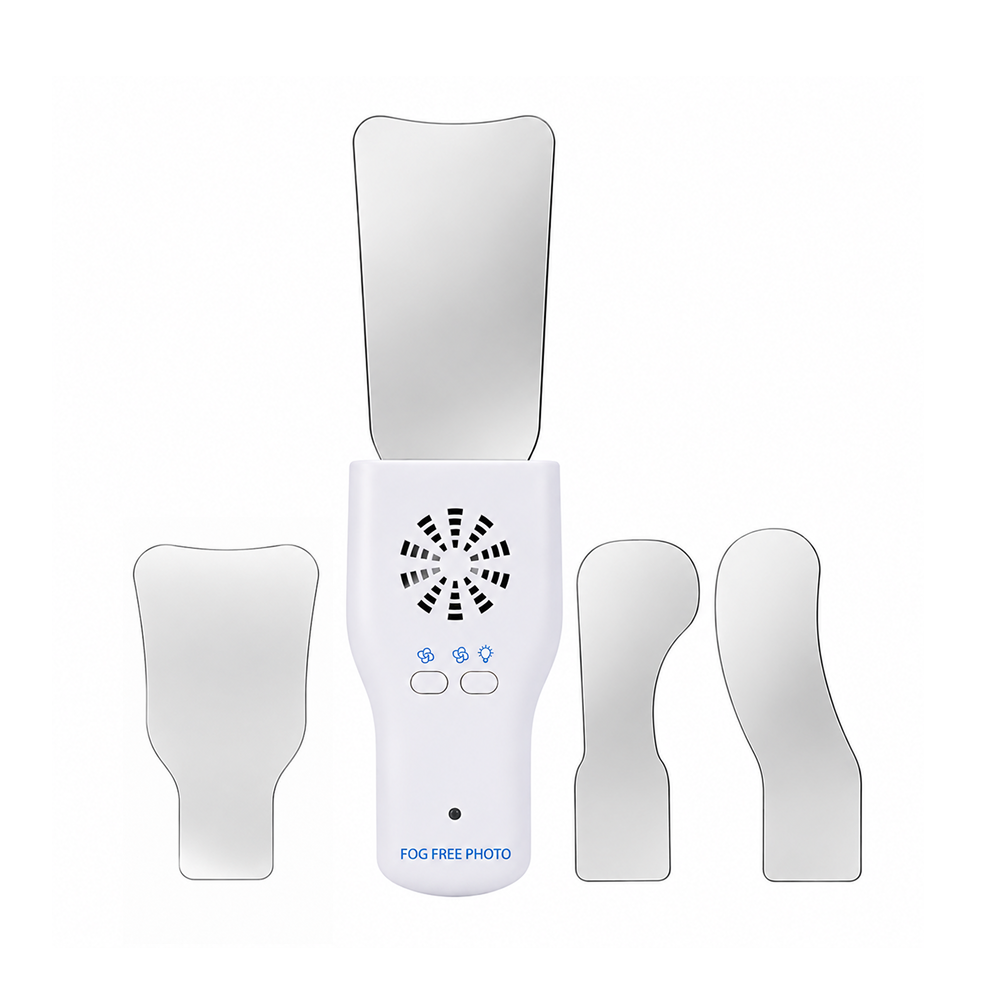
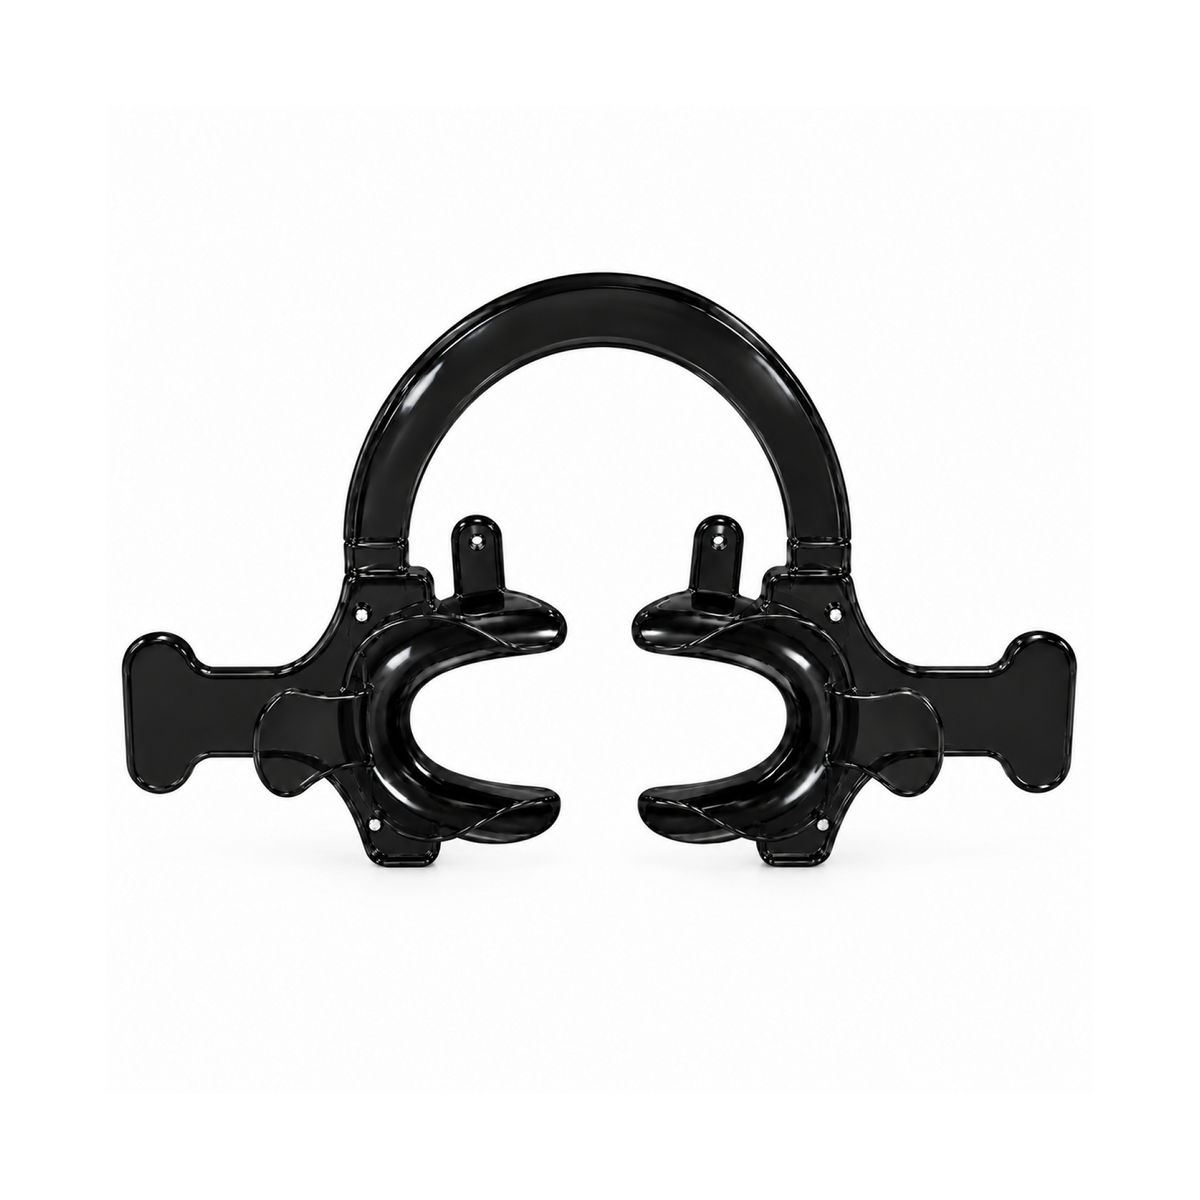
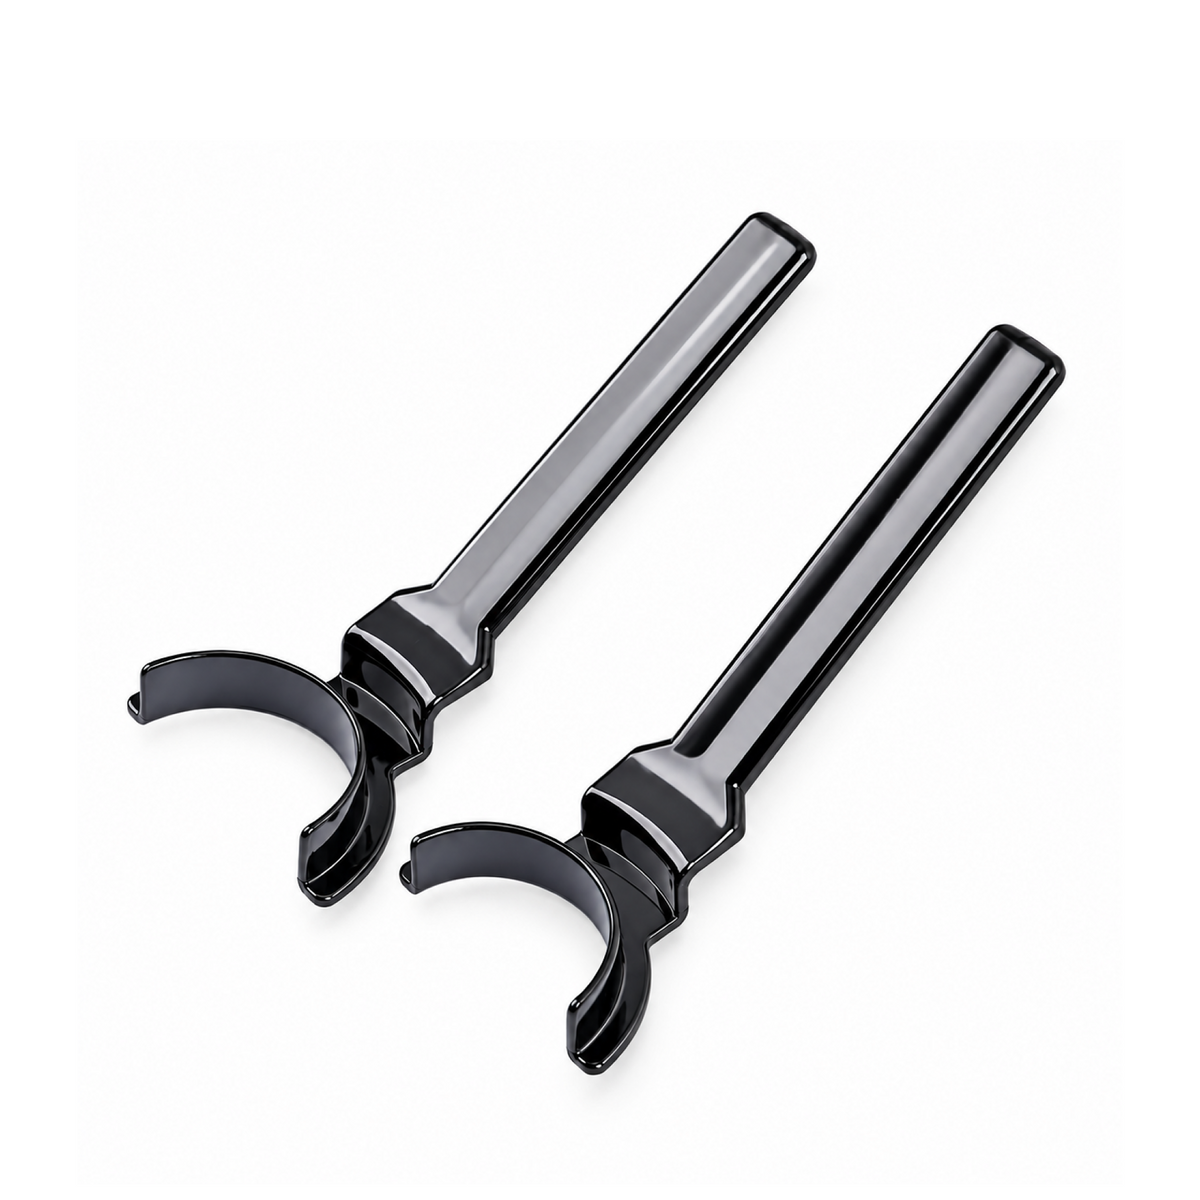
Las fotografías intraorales de alta calidad proporcionan a los técnicos información que los valores numéricos del color por sí solos no pueden transmitir. Un Dentiphoto Set para fotografía ayuda a los profesionales clínicos a capturar imágenes clínicas uniformes que mejoran la comunicación con el laboratorio dental.
Las fotografías permiten a los técnicos evaluar:
- textura superficial
- translucidez del esmalte
- manchas blancas
- líneas de fisura
- halo incisal
- manchado cervical
- caracterización localizada
Cuando las mediciones digitales del color se combinan con fotografías clínicas estandarizadas, la comunicación con el laboratorio se vuelve mucho más predecible, especialmente en restauraciones cerámicas altamente estéticas.

La fotografía dental clínica estandarizada mejora la documentación del color y la comunicación con el laboratorio.
Información clínica
Los resultados estéticos más predecibles rara vez se logran confiando exclusivamente en la selección visual o digital del color. Los profesionales con experiencia suelen combinar ambos métodos: utilizan una guía visual de colores para evaluar el diente de forma natural y un dispositivo digital para verificar las mediciones, documentar el caso y mejorar la comunicación con el laboratorio dental.
Factores que afectan la precisión de la selección del color
Seleccionar el color correcto es solo una parte del proceso. Incluso la guía de colores más avanzada o el dispositivo digital más sofisticado no pueden compensar unas condiciones clínicas deficientes o un flujo de trabajo inconsistente.

Factores clínicos que influyen en la precisión de la selección del color dental y la evaluación del color de los dientes.
La selección exitosa del color depende del control de varias variables que influyen en cómo tanto el profesional como el dispositivo de medición perciben el color de los dientes. Comprender estos factores ayuda a reducir la variabilidad, mejorar la comunicación con el laboratorio dental y lograr resultados estéticos más predecibles.
Condiciones de iluminación
La iluminación es el factor individual más importante que afecta la percepción del color.
La luz natural del día sigue siendo el estándar de referencia porque proporciona un espectro de luz equilibrado que permite a los profesionales evaluar el color de los dientes con una distorsión mínima. Sin embargo, como la iluminación natural cambia a lo largo del día y no siempre está disponible, muchos consultorios modernos utilizan luces LED del consultorio con corrección de color y una temperatura de color cercana a la luz del día (aproximadamente 5.500 K).
En cambio, la iluminación cálida convencional puede hacer que los dientes parezcan más amarillos o rojizos, mientras que la iluminación fría puede aumentar la percepción del brillo y reducir el croma. La iluminación mixta, como la combinación de la luz natural con las luces superiores del consultorio, también puede producir resultados inconsistentes.
Recomendaciones clínicas
- Realice la selección del color bajo una iluminación estandarizada siempre que sea posible.
- Evite la luz solar directa, ya que puede crear reflejos excesivos.
- Apague las fuentes de luz innecesarias que alteren la percepción del color.
- Siempre que sea posible, utilice las mismas condiciones de iluminación para la fotografía clínica y la selección del color.
Hidratación del diente
Los dientes naturales comienzan a deshidratarse casi inmediatamente después de una exposición prolongada al aire.
A medida que el esmalte pierde humedad, dispersa la luz de manera diferente, lo que hace que el diente parezca más claro, más opaco y menos translúcido. Este cambio temporal puede llevar al profesional a seleccionar un color demasiado claro, lo que dará como resultado una restauración que parecerá más oscura después de que el diente se rehidrate.
Por este motivo, los profesionales con experiencia siempre realizan la selección del color antes de preparar el diente, siempre que sea posible.
Recomendaciones clínicas
- Seleccione el color antes de preparar el diente.
- Evite un secado prolongado con aire antes de la evaluación.
- Minimice el tiempo entre la limpieza del diente y la selección del color.
-
Si se produce deshidratación, deje que el diente se rehidrate antes de tomar la decisión final.
Limpieza de la superficie
Las manchas extrínsecas, la placa, el cálculo, la pasta de pulido y los residuos superficiales pueden influir significativamente en el color aparente de un diente.
La selección del tono siempre debe realizarse después de una limpieza suave, pero antes de comenzar los procedimientos restauradores.
El objetivo es evaluar el diente natural, no una alteración temporal del color de la superficie.
Recomendaciones clínicas
- Elimine la placa y los depósitos blandos.
- Pula solo cuando esté clínicamente indicado.
- Enjuague minuciosamente antes de la evaluación.
- Evite dejar residuos de pasta de pulido sobre el esmalte.
Posición del paciente
La posición del paciente afecta tanto al ángulo de observación como a la forma en que la luz se refleja en el esmalte.
Para una evaluación más precisa, el paciente debe estar sentado en posición erguida, con el diente situado aproximadamente al nivel de los ojos del clínico. Las posiciones reclinadas suelen generar sombras y reflejos que interfieren con la evaluación del color.
Recomendaciones clínicas
- Siente al paciente en posición erguida.
- Mantenga los ojos del clínico al nivel del diente.
- Evalúe el diente desde una distancia normal de conversación.
- Evite evaluar el color desde ángulos extremos.
Colores circundantes
La percepción humana del color está influida por los objetos circundantes.
El lápiz labial intenso, la ropa colorida, el maquillaje recargado, los guantes de colores brillantes o las paredes reflectantes del consultorio pueden alterar inconscientemente la percepción del tono mediante el contraste simultáneo de colores.
Muchos consultorios de estética crean intencionadamente un entorno neutro para la selección del tono.
Recomendaciones clínicas
- Retire el lápiz labial intenso antes de seleccionar el tono.
- Utilice un babero gris neutro cuando sea posible.
- Evite los fondos de colores intensos.
- Reduzca los reflejos que distraen dentro del consultorio.
Fatiga visual
El sistema visual humano se adapta con una rapidez sorprendente.
Después de mirar fijamente las guías de tonos durante solo unos segundos, la retina se vuelve menos sensible a las diferencias sutiles de luminosidad y croma. Este fenómeno puede provocar que la selección del tono sea progresivamente menos precisa durante las comparaciones prolongadas.
Una técnica sencilla que utilizan los clínicos experimentados consiste en mirar periódicamente una tarjeta gris neutra entre observaciones. Esto ayuda a «reiniciar» la percepción del color y minimiza la adaptación visual.
Recomendaciones clínicas
- Compare las guías de tonos durante no más de 5–7 segundos cada vez.
- Mire una superficie gris neutra entre una comparación y otra.
- Tome descansos breves durante los casos estéticos prolongados.
- Complete la selección del tono al principio de la cita, antes de que aparezca la fatiga visual.
Anatomía dental y características ópticas
Los dientes naturales no tienen un color uniforme.
Las distintas regiones del mismo diente presentan propiedades ópticas diferentes:
- Tercio cervical – generalmente más oscuro y con mayor croma debido al grosor de la dentina.
- Tercio medio – representa el tono predominante del cuerpo.
- Tercio incisal – a menudo más translúcido, con características opalescentes y azul grisáceas.
Seleccionar un solo tono para todo el diente puede simplificar en exceso su apariencia y producir restauraciones carentes de profundidad y vitalidad.
Recomendaciones clínicas
Evalúa cada región por separado y comunica cualquier variación significativa al laboratorio. Cuando corresponda, complementa la designación del color con fotografías clínicas o un mapa digital del color.
Materiales restauradores
El aspecto final de una restauración depende no solo de la selección del color, sino también de las propiedades ópticas del propio material restaurador.
Las distintas cerámicas, los composites, los sistemas de zirconia y los cementos de resina varían en translucidez, fluorescencia y transmisión de la luz. En consecuencia, dos restauraciones fabricadas con la misma designación de color pueden verse notablemente diferentes si se elaboran con materiales distintos.
Siempre que sea posible, la selección del color debe considerarse junto con el material restaurador previsto y el grosor de la restauración.
Comunicación con el laboratorio dental
Incluso una selección perfecta del color puede fracasar si la información clínica importante no se comunica de manera eficaz.
Un técnico de laboratorio se beneficia de mucho más que una única anotación como «A2». Una documentación completa permite al técnico reproducir las sutiles características ópticas que contribuyen a una restauración de aspecto natural.
Siempre que sea posible, proporciona:
- el color seleccionado;
- fotografías clínicas de alta calidad;
- imágenes con la guía de colores colocada junto al diente;
- notas que describan la translucidez y la caracterización;
- información sobre los dientes adyacentes;
- detalles sobre el material restaurador previsto.
Cuanto más completa sea la información, más previsible será el resultado estético final.
Conclusión clave
La selección precisa del color rara vez depende de un solo factor. Es el resultado de un flujo de trabajo estandarizado en el que la iluminación, la hidratación, la posición del paciente, la evaluación visual, la verificación digital, la fotografía clínica y la comunicación con el laboratorio trabajan conjuntamente. La consistencia —no solo la tecnología— es lo que produce resultados estéticos previsibles.
Errores comunes en la selección del color dental
Incluso los profesionales con experiencia encuentran ocasionalmente discrepancias de color. En la mayoría de los casos, estos problemas no se deben a la guía de colores ni al dispositivo digital en sí, sino a inconsistencias en el flujo de trabajo clínico.
Reconocer los errores más comunes —y comprender cómo prevenirlos— puede mejorar significativamente la previsibilidad de las restauraciones estéticas, al tiempo que reduce los ajustes, las repeticiones y la insatisfacción del paciente.
Selección del color después de la preparación dental
Uno de los errores más comunes es esperar a que el diente haya sido preparado antes de seleccionar su color.
Durante la preparación, el esmalte queda expuesto al aire, la irrigación y el aislamiento prolongado, factores que contribuyen a la deshidratación. A medida que el diente pierde humedad, se vuelve más claro y opaco de lo que es naturalmente. Elegir un color en esta etapa suele dar como resultado una restauración que parece más oscura una vez que el diente se rehidrata.
Mejor práctica
Siempre que sea posible, realiza la selección del color antes de la preparación dental, la colocación del dique de goma o un secado prolongado con aire.
Uso de una iluminación inconsistente
La percepción del color cambia drásticamente con distintas fuentes de luz.
Evaluar el diente bajo la iluminación cálida del consultorio y luego comprobar la restauración a la luz del día puede revelar diferencias perceptibles que no eran evidentes durante el tratamiento.
Del mismo modo, combinar varias fuentes de luz —como la luz del día, las luces del techo y la lámpara operatoria dental— crea condiciones de color inconsistentes.
Mejor práctica
Utilice una iluminación estandarizada y corregida cromáticamente para cada selección de color y mantenga las mismas condiciones de iluminación al tomar fotografías clínicas.
Mirar las guías de color durante demasiado tiempo
La visión humana se adapta rápidamente al color.
La comparación prolongada de las guías de color reduce la sensibilidad a diferencias sutiles de valor y croma, lo que dificulta cada vez más una selección precisa.
Mejor práctica
Compare las guías de color solo durante unos segundos cada vez y, después, mire brevemente una superficie gris neutra antes de continuar.
Ignorar la hidratación del diente
Un diente deshidratado rara vez representa su color real.
Este problema ocurre habitualmente durante las preparaciones para carillas, los procedimientos de coronas de cobertura total y las citas cosméticas prolongadas.
Mejor práctica
Si se ha producido deshidratación, permita que el diente se rehidrate antes de realizar la selección final del color, siempre que las circunstancias clínicas lo permitan.
Evaluar únicamente el centro del diente
Los dientes naturales presentan una gran variabilidad.
El tercio cervical suele ser más oscuro y saturado, mientras que el borde incisal tiende a ser más translúcido. Seleccionar un solo color basándose únicamente en la porción media del diente puede producir restauraciones que parezcan planas o artificiales.
Mejor práctica
Evalúe por separado los tercios cervical, medio e incisal, y comunique al laboratorio cualquier variación significativa.
Depender de una sola designación de color
Escribir solo «A2» en la prescripción del laboratorio rara vez proporciona suficiente información para restauraciones altamente estéticas.
Las cerámicas modernas pueden reproducir efectos ópticos sutiles, pero los técnicos necesitan suficiente información clínica para hacerlo con precisión.
Mejor práctica
Siempre que sea posible, incluya:
- el color principal;
- color del muñón (para restauraciones totalmente cerámicas, cuando corresponda);
- fotografías clínicas;
- imágenes con la guía de color colocada junto al diente;
- notas que describan la translucidez, las manchas blancas, las hipocalcificaciones o los efectos incisales.
Pasar por alto la fotografía clínica
Las fotografías clínicas suelen considerarse opcionales, pero se encuentran entre las herramientas de comunicación más valiosas disponibles.
Una fotografía de alta calidad captura detalles anatómicos, textura de la superficie y efectos ópticos que no pueden describirse adecuadamente solo con notas escritas.
En las restauraciones anteriores complejas, la fotografía debe considerarse una parte esencial del proceso de selección del color, no un paso adicional.
Mejor práctica
Tome fotografías estandarizadas antes del tratamiento utilizando una iluminación uniforme, un balance de blancos adecuado y una guía de color colocada junto al diente siempre que sea posible.
Depender exclusivamente de los dispositivos digitales
Los dispositivos digitales de selección del color proporcionan mediciones muy precisas, pero no pueden evaluar todos los aspectos de un diente natural.
La textura de la superficie, las grietas del esmalte, la fluorescencia, la opalescencia y las características localizadas aún requieren una evaluación visual cuidadosa.
Mejor práctica
Use las mediciones digitales como apoyo, no como sustituto, de la observación clínica. Los resultados más predecibles se logran cuando los datos objetivos se combinan con la evaluación visual y la documentación fotográfica.
Comunicación incompleta con el laboratorio dental
Muchas discrepancias de tono no se originan en el gabinete dental, sino en la transferencia de información al laboratorio.
Ni siquiera el técnico más cualificado puede reproducir detalles que nunca se comunicaron.

Las fotografías clínicas completas y la documentación del tono mejoran la comunicación entre el odontólogo y el laboratorio dental.
Mejor práctica
Para los casos de alta exigencia estética, proporcione una prescripción completa al laboratorio que incluya:
- color seleccionado;
- material restaurador;
- fotografías de la preparación;
- fotografías de las pestañas de tono;
- notas sobre la caracterización;
- nivel de translucidez deseado;
- imágenes de referencia de los dientes adyacentes.
Una comunicación clara reduce la necesidad de rehacer trabajos, minimiza los ajustes y ayuda a garantizar que la restauración cumpla las expectativas tanto del odontólogo como del paciente.
Consejo clínico
La mayoría de los trabajos rehechos por problemas de tono se deben a inconsistencias en el flujo de trabajo, no a guías de tonos ni dispositivos digitales incorrectos. Un protocolo estandarizado, combinado con una comunicación clara con el laboratorio y fotografías clínicas de alta calidad, es mucho más importante que el sistema específico utilizado para seleccionar el tono.
Flujo de trabajo clínico paso a paso para una selección precisa del tono dental
La selección uniforme de tonos se logra mediante un flujo de trabajo estandarizado, en lugar de depender únicamente de la experiencia. Seguir el mismo protocolo con cada paciente ayuda a minimizar las variables, mejorar la comunicación con el laboratorio dental y reducir la probabilidad de rehacer los trabajos.
El siguiente enfoque paso a paso se utiliza ampliamente en la odontología restauradora y estética.
Paso 1: Limpie la superficie dental
Antes de evaluar el color dental, elimine la placa, los depósitos blandos, los restos de alimentos y las manchas superficiales que puedan alterar el aspecto del esmalte.
Use una pasta de pulido no abrasiva solo cuando esté clínicamente indicada; después, enjuague bien y seque suavemente el diente. La superficie debe estar limpia, pero no deshidratada.
Por qué es importante: La contaminación de la superficie puede ocultar el tono real del diente y provocar una selección inexacta del color.
Paso 2: Coloque correctamente al paciente
Coloque al paciente en posición erguida, con los dientes anteriores maxilares aproximadamente a la altura de los ojos del odontólogo.
Evite seleccionar los tonos mientras el paciente está completamente reclinado, ya que los cambios en el ángulo de observación y la iluminación pueden afectar la percepción del color.
Por qué es importante: Una posición de observación constante mejora tanto la evaluación visual como las mediciones digitales.
Paso 3: Seleccione el tono antes de preparar el diente
La selección del tono siempre debe completarse antes de preparar el diente, colocar el dique de goma o secarlo prolongadamente con aire.
Cuando el esmalte comienza a deshidratarse, se vuelve más claro y opaco, lo que aumenta el riesgo de elegir un tono incorrecto.
Por qué es importante: Los dientes hidratados ofrecen la representación más precisa del color natural.
Paso 4: Use una iluminación estandarizada
Evalúe el diente bajo luz natural siempre que sea posible o bajo una luz LED con corrección cromática y una temperatura de color cercana a la luz del día.
Evite las condiciones de iluminación mixtas y minimice los reflejos de las superficies cercanas.
Por qué es importante: Una iluminación uniforme reduce la variabilidad y mejora la reproducibilidad.
Paso 5: Comience con el valor
Al utilizar una guía visual de colores, determine primero el valor (luminosidad u oscuridad) del diente.
Las investigaciones y la experiencia clínica han demostrado que los errores de valor suelen ser más perceptibles que las pequeñas diferencias de tono o croma. Una vez identificado el valor correcto, evalúe el croma y el tono para perfeccionar la selección final.
Por qué es importante: La visión humana detecta las diferencias de luminosidad con mayor facilidad que las diferencias de color.
Paso 6: Compare rápidamente
Sostenga la guía de color junto al diente solo durante unos segundos.
La comparación prolongada provoca adaptación visual y reduce la sensibilidad a las diferencias sutiles. Entre una comparación y otra, enfoque brevemente la vista en una tarjeta gris neutra u otra superficie neutra.
Por qué es importante: Las observaciones breves ayudan a mantener una percepción precisa del color.
Paso 7: Evalúe todo el diente
No base la selección del color en una sola zona.
Evalúe el:
- tercio cervical;
- tercio medio;
- tercio incisal.
Busque diferencias en la translucidez, el halo incisal, las manchas blancas, los surcos del desarrollo y las tinciones localizadas.
Por qué es importante: Los dientes naturales presentan variaciones ópticas complejas que no pueden representarse únicamente con una designación de color.
Paso 8: Verifique con un dispositivo digital (cuando esté disponible)
Si dispone de un espectrofotómetro o colorímetro, utilícelo para confirmar la evaluación visual, no para sustituirla.
Las mediciones digitales proporcionan datos objetivos y mejoran la uniformidad, especialmente en restauraciones altamente estéticas.
Por qué es importante: La combinación de métodos visuales y digitales reduce la subjetividad.
Paso 9: Tome fotografías clínicas estandarizadas
Antes de completar el tratamiento, documente el caso con fotografías de alta calidad.
Siempre que sea posible, incluya:
- una fotografía de la sonrisa completa;
- una vista frontal retraída;
- imágenes de cerca del diente;
- fotografías con la guía de color seleccionada colocada junto al diente;
- imágenes adicionales que muestren la caracterización o rasgos anatómicos únicos.
En restauraciones cerámicas altamente estéticas, la fotografía con polarización cruzada puede ayudar aún más a los técnicos de laboratorio al reducir los reflejos superficiales y revelar las características internas del color.
Por qué es importante: Las fotografías clínicas comunican información que no puede expresarse únicamente mediante códigos de color.
Paso 10: Proporcione instrucciones completas al laboratorio
La selección de color exitosa va más allá del sillón dental.
Una prescripción detallada para el laboratorio debe incluir:
- color seleccionado;
- material restaurador;
- color del muñón (cuando corresponda);
- requisitos de translucidez;
- notas sobre la caracterización;
- fotografías clínicas;
- informe digital del color (si está disponible);
- cualquier expectativa estética específica del paciente.
Cuanta más información se proporcione, con mayor precisión podrá el técnico reproducir el aspecto natural del diente.
Lista de comprobación para la selección del color junto al sillón
Para mayor comodidad, muchos profesionales siguen una sencilla lista de comprobación mental antes de finalizar la selección del color:
-
Limpia el diente
-
Sienta al paciente en posición erguida
-
Selecciona el color antes de la preparación
-
Utiliza una iluminación estandarizada
-
Determina primero el valor
-
Compara brevemente las muestras de color
-
Evalúa los tercios cervical, medio e incisal
-
Confirma digitalmente cuando sea posible
-
Toma fotografías estandarizadas
- Envía la documentación completa al laboratorio
Este enfoque sistemático ayuda a minimizar los errores y garantiza que cada miembro del equipo restaurador —desde el profesional clínico hasta el técnico dental— trabaje con la misma información precisa.
Consejo clínico
La correspondencia predecible del color no es el resultado de un solo instrumento o técnica. Es el resultado de un flujo de trabajo disciplinado en el que cada paso —desde la iluminación y la hidratación hasta la fotografía y la comunicación con el laboratorio— se realiza de manera constante. Las consultas que estandarizan este protocolo suelen experimentar menos repeticiones, citas más eficientes y una mayor satisfacción del paciente.
Buenas prácticas para una correspondencia del color predecible
Incluso con guías de color modernas y tecnologías digitales avanzadas, unos resultados estéticos constantes dependen principalmente de la disciplina clínica. Establecer un protocolo estandarizado —y seguirlo con cada paciente— reduce la variabilidad y mejora la comunicación durante todo el proceso restaurador.
Las siguientes buenas prácticas son ampliamente recomendadas por odontólogos restauradores y técnicos dentales con experiencia.
Estandariza cada cita
Una de las formas más eficaces de mejorar la correspondencia del color es eliminar las variables innecesarias.
Siempre que sea posible, realiza la selección del color utilizando el mismo protocolo clínico, las mismas condiciones de iluminación, la misma configuración fotográfica y el mismo proceso de comunicación con cada paciente.
La constancia es mucho más valiosa que cambiar de técnica de una cita a otra.
Combina la evaluación visual con la verificación digital
Las guías visuales de color siguen siendo indispensables porque permiten a los profesionales evaluar el aspecto general de un diente en su entorno natural.
Los dispositivos digitales proporcionan mediciones objetivas que mejoran la reproducibilidad y la documentación.
En lugar de elegir un método sobre el otro, muchos profesionales con experiencia utilizan la evaluación visual como método principal y las mediciones digitales como confirmación en casos estéticos exigentes.
Piensa más allá del código de color
Una notación como A2 o 2M2 representa solo un punto de partida.
Los dientes naturales poseen innumerables características ópticas que no pueden capturarse con una sola designación de color, entre ellas:
- translucidez;
- fluorescencia;
- opalescencia;
- textura de la superficie;
- grietas del esmalte;
- surcos del desarrollo;
- lesiones de mancha blanca;
- manchas cervicales;
- halos incisales.
Reconocer y comunicar estos detalles a menudo marca la diferencia entre una restauración aceptable y una excepcional.
Incorpora la fotografía clínica a tu rutina
La fotografía no debe reservarse exclusivamente para la odontología estética.
Las imágenes clínicas estandarizadas mejoran la comunicación, simplifican la documentación, facilitan la educación del paciente y proporcionan información invaluable al laboratorio dental.
En las restauraciones cerámicas anteriores, las fotografías suelen ser tan importantes como el color seleccionado.
Siempre que sea posible, utilice:
- aumento constante;
- balance de blancos estandarizado;
- fondos neutros;
- imágenes con polarización cruzada para casos estéticos complejos.
Trabaje estrechamente con su laboratorio dental
La selección del color es un proceso colaborativo.
Ni siquiera el profesional clínico más experimentado puede lograr resultados predecibles sin una comunicación clara, y ni siquiera el técnico más cualificado puede reproducir detalles que no se hayan documentado.
Proporcionar información completa —incluidas fotografías, selección del material, detalles de la preparación y notas sobre la caracterización— ayuda al laboratorio a fabricar restauraciones que reproduzcan fielmente la dentición natural del paciente.
Una comunicación eficaz también reduce la necesidad de rehacer trabajos, ahorra tiempo en el sillón dental y mejora la satisfacción general del paciente.
Siga calibrando su ojo
La percepción del color es una habilidad clínica que mejora con la práctica.
Muchos odontólogos especializados en estética comparan periódicamente sus selecciones visuales de color con mediciones digitales, analizan los casos con los técnicos de laboratorio y revisan las restauraciones terminadas bajo diferentes condiciones de iluminación.
Esta calibración continua ayuda a perfeccionar la evaluación visual y aumenta la coherencia a largo plazo.
Selección del color: visual frente a digital
Tanto los métodos visuales como los digitales de selección del color se utilizan ampliamente en la odontología restauradora. Aunque las guías de color tradicionales siguen siendo el estándar en muchos entornos clínicos, las tecnologías digitales ofrecen mayor objetividad y reproducibilidad. La siguiente tabla resume las principales diferencias entre estos dos enfoques.

Comparación de los métodos visuales y digitales de selección del color utilizados en la odontología restauradora contemporánea.
Conclusión
La selección del color dental es mucho más que elegir la muestra de color más parecida. Es un proceso clínico sistemático que combina principios científicos, protocolos estandarizados y una comunicación eficaz para reproducir el aspecto de los dientes naturales.
Las guías visuales de color siguen siendo la base de la odontología restauradora porque son prácticas, fiables y reconocidas universalmente. Los sistemas digitales de selección de color complementan este proceso al proporcionar mediciones objetivas, una mejor documentación y mayor coherencia, especialmente en casos de alta exigencia estética.
Sin embargo, ni la tecnología ni la experiencia por sí solas garantizan el éxito. Los resultados predecibles se logran cuando los profesionales clínicos controlan las variables que influyen en la percepción del color, siguen un flujo de trabajo coherente, documentan minuciosamente los casos y colaboran estrechamente con el laboratorio dental.
A medida que siguen aumentando las expectativas de los pacientes respecto a la odontología estética, dominar la selección del color ya no es una habilidad opcional, sino un componente esencial para ofrecer restauraciones que tengan un aspecto tan natural como su funcionalidad.
Conclusión clínica
Los mejores resultados en la selección del color no se logran confiando en la tecnología más avanzada, sino combinando un criterio clínico sólido, protocolos estandarizados, fotografías de alta calidad y una comunicación clara con el laboratorio. Cuando estos elementos trabajan en conjunto, las restauraciones estéticas se vuelven más predecibles, más eficientes de producir y más satisfactorias tanto para los profesionales clínicos como para los pacientes.
Pautas clínicas y del sector
- VITA Zahnfabrik. VITA Toothguide 3D-MASTER.
- VITA Zahnfabrik. Guía de colores VITA Classical A1–D4.
Herramientas recomendadas para la selección del color
Para lograr resultados predecibles y uniformes en la selección del color, Dentiphoto recomienda las siguientes herramientas profesionales:
- Guía de colores VITA Classical — para la selección visual tradicional del color.
- Guía VITA Toothguide 3D-MASTER — para la selección sistemática del color basada en valor, croma y matiz.
- Dispositivo digital de selección del color — para la verificación digital objetiva del color.
- Set de fotografía dental — para la documentación clínica estandarizada y la comunicación con el laboratorio.
Explora la gama completa de herramientas profesionales de Dentiphoto para la selección del color y soluciones de fotografía dental.
Referencias
- Paul S, Peter A, Pietrobon N, Hämmerle CHF. Selección visual e instrumental del color. Journal of Prosthetic Dentistry.
- Dede DÖ et al. Comparación de la selección visual del color, mediante escáner intraoral y mediante espectrofotómetro: estudio clínico. Journal of Prosthetic Dentistry.
- Akl et al. El papel de los escáneres intraorales en el proceso de selección del color: revisión sistemática. Journal of Prosthodontics.
- Vitai V. et al. Comparación del color entre el escáner intraoral y el espectrofotómetro para la selección del color: revisión sistemática y metanálisis. Journal of Esthetic and Restorative Dentistry. Equipo editorial de Dentiphoto
Lecturas adicionales
Los lectores interesados en la ciencia avanzada del color y la selección digital del color también pueden consultar investigaciones actuales sobre espectrofotometría, escáneres intraorales e inteligencia artificial para la selección del color dental. Revisiones sistemáticas recientes sugieren que los sistemas digitales mejoran la reproducibilidad, pero la verificación visual sigue siendo esencial en la práctica clínica.
Revisado por el equipo editorial de Dentiphoto
Contenido revisado para verificar su exactitud técnica mediante la literatura actual sobre odontología restauradora y las recomendaciones de los fabricantes.